Custom Styling
Introduction to Templates
Scheduler allows you to set appearance of its events. Meanwhile you can change displaying parameters for all events at once, as well, you can set dynamic rules to diversify events appearance accordingly to their data.
The appearance of each event is defined by three templates:
- scheduler.templates.event_header - sets the way of displaying event header (by default, event date);
- scheduler.templates.event_text - sets text in the middle of an event bar;
- scheduler.templates.event_class - sets css class which will be assigned to an event.
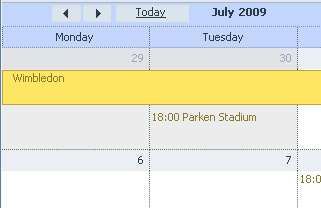
As in month-view, events are displayed differently, set of templates is called otherwise:
- scheduler.templates.event_bar_date - sets data for events with specified event start;
- scheduler.templates.event_bar_text - sets text in the middle of an event bar;
- scheduler.templates.event_class - sets css class which will be assigned to an event.
All templates are functions which get three parameters:
- start date;
- end date;
- event object.
Redefining Appearance
The simplest way to redefine events appearance - using event_class:
scheduler.templates.event_class=function(start,end,event){
    if (start < (new Date())) //if date in past
          return "past_event"; //then set special css class for it
}
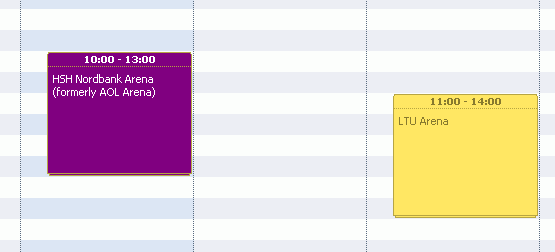
Actually all events, with start date sooner than the current time, will have “past_event” class. We are allowed to add styles to the page to select them visually.
    /*event in day or week view*/
	.dhx_cal_event.past_event div{
		background-color:purple !important;
		color:white !important;
	}
    /*multi-day event in month view*/
	.dhx_cal_event_line.past_event{
		background-color:purple !important;
		color:white !important;
	}
    /*event with fixed time, in month view*/
	.dhx_cal_event_clear.past_event{
		color:purple !important;
	}
as you can see, we are using common classes of scheduler plus to our new css class to define rules specific for each element.
Data format of scheduler allows to support additional fields, thus you have an opportunity to set a new field, event type, for example, and assign different styles to different event types.
$scheduler->render_table("events","event_id","start_date,end_date,event_name,type");
<data>
  <event id="2">
    <start_date>2009-05-24 00:00:00</start_date>
    <end_date>2009-06-08 00:00:00</end_date>
    <text>French Open</text>
    <type>1</type>
  </event>
scheduler.templates.event_class=function(start,end,event){
    switch ( event.type ){
          case "1" : return "some_event";
          case "2" : return "other_event";
    }
}
Now you have just to assign styles for some_event and other_event, to make each event time display differently.
Redefining Content
As well as styles, you are allowed to set the way an event is displayed on the page.
scheduler.templates.event_text=function(start,end,event){
        return "Text:<b> "+event.text+"</b><br>"+"Descr."+event.details;
}
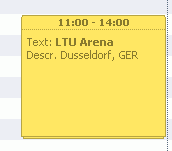
as you can see, any HTML can be used inside events, which allows to considerably change description appearance.
scheduler.templates.event_header=function(start,end,event){
        return (event.important?"<img src='important.gif' />":"")+scheduler.templates.hour_scale(start);
}
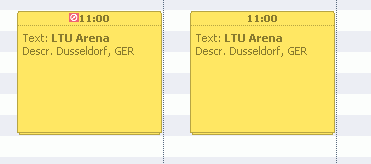
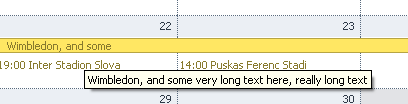
scheduler.templates.event_bar_text=function(start,end,event){
        var text = event.text.substr(0,20);
        return "<span title='"+event.text+"'>"+text+"</span>";
}
Scheduler Appearance
Tabs
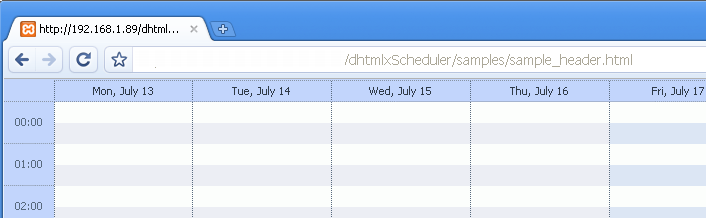
Scheduler appearance is defined by HTML template - if inside there are some unnecessary buttons, you can simply remove them from template.
	<div id="scheduler_here" class="dhx_cal_container" style='width:100%; height:100%;'>
		<div class="dhx_cal_navline">
			<div class="dhx_cal_date"></div>
			<div class="dhx_cal_tab" name="day_tab" style="right:204px;"></div>
			<div class="dhx_cal_tab" name="week_tab" style="right:140px;"></div>
		</div>
		<div class="dhx_cal_header">
		</div>
		<div class="dhx_cal_data">
		</div>
	</div>

Hiding all tabs
You need to change style of @dhx_cal_navline element inside template, and change the height settings of scheduler
	<div id="scheduler_here" class="dhx_cal_container" style='width:100%; height:100%;'>
		<div class="dhx_cal_navline" style="display:none">
scheduler.xy.nav_height = 0;
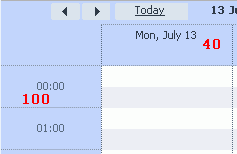
Size of scales
Height of x-scale
scheduler.xy.scale_height = 40; //height of x-scale
Width of y-scale
scheduler.xy.scale_width = 100; //width of y-scale
Custom size of event bars
<style type=“text/css” media=“screen”>
.dhx_cal_event_line {
	height:33px;
}
</style>
scheduler.xy.bar_height = 40; //space reserved for single bar